(Created page with "frame|Sailor Moon S 3DO Game A 2D fighting game made for the <span style="color: rgb(0, 0, 0); font-family: sans-serif; font-style: normal; li...") |
mNo edit summary |
||
| (42 intermediate revisions by 17 users not shown) | |||
| Line 1: | Line 1: | ||
| + | {{Games Infobox|release = 1995|platform(s) = 3DO|language(s) = Japanese}} |
||
| ⚫ | |||
| − | + | '''"Pretty Soldier Sailor Moon S" '''is a 2D fighting game made for the [[Wikipedia:3DO Interactive Multiplayer|3DO Interactive Multiplayer console]]. Released in 1995, it features most of the main characters from Sailor Moon S (minus Sailor Saturn). Each Sailor Senshi has her own set of attacks from both the anime and manga series as well as their signature finishing moves that can be used once the special meter gauge is full. |
|
| ⚫ | |||
| ⚫ | |||
| ⚫ | |||
| ⚫ | |||
| ⚫ | |||
| − | |||
| + | *1P VS COM |
||
| − | |||
| ⚫ | |||
| ⚫ | |||
| − | ====<span style="font-style: normal; ">Super Battle</span>==== |
||
| ⚫ | |||
| − | *<span style="font-size: 14px; font-style: normal; ">1P VS COM</span> |
||
*1P VS 2P |
*1P VS 2P |
||
*COM VS COM |
*COM VS COM |
||
| ⚫ | |||
| − | |||
| − | |||
| − | *<span style="font-size: 14px;">1P VS COM</span> |
||
| − | *<span style="font-style: normal; ">1P VS 2P</span> |
||
| − | |||
| ⚫ | |||
| − | |||
| ⚫ | |||
| + | === Team Battle === |
||
| + | *1P VS COM |
||
| + | *1P VS 2P |
||
| ⚫ | |||
| + | *Level: Easy, Normal, Hard |
||
| + | *Time: On, Off |
||
| + | *Sound: Stereo, Mono |
||
| + | *TV: Normal, Wide |
||
| + | *Control Keys: Normal, Easy 1, Easy 2 |
||
| ⚫ | |||
| + | *Profiles |
||
| + | *Music |
||
==Playable Characters== |
==Playable Characters== |
||
| − | <gallery |
+ | <gallery position="center"> |
Sailor Moon Portrait.png|Sailor Moon |
Sailor Moon Portrait.png|Sailor Moon |
||
| ⚫ | |||
| ⚫ | |||
Sailor Mercury Portrait.png|Sailor Mercury |
Sailor Mercury Portrait.png|Sailor Mercury |
||
Sailor Mars Portrait.png|Sailor Mars |
Sailor Mars Portrait.png|Sailor Mars |
||
| Line 36: | Line 40: | ||
Sailor Neptune Portrait.png|Sailor Neptune |
Sailor Neptune Portrait.png|Sailor Neptune |
||
Sailor Pluto Portrait.png|Sailor Pluto |
Sailor Pluto Portrait.png|Sailor Pluto |
||
| ⚫ | |||
| ⚫ | |||
</gallery> |
</gallery> |
||
| − | ==Sailor Moon's Move List== |
+ | ==[[Usagi Tsukino / Sailor Moon (manga)|Sailor Moon]]'s Move List== |
| − | {| |
+ | {| class="article-table" style="background-color: rgb(255, 255, 255); height: 200px; width: 200px; " cellspacing="1" cellpadding="1" border="1" align="center" |
| − | ! scope="col" style="text-align: center; "|Body Attack |
+ | ! scope="col" style="text-align: center; " |''[[Sailor Body Attack|Body Attack]]'' |
| − | ! scope="col" style="text-align: center; "|Moon Screw Punch |
+ | ! scope="col" style="text-align: center; " |''[[Moon Screw Punch]]'' |
| − | ! scope="col" style="text-align: center; "|Moon Tiara Action |
+ | ! scope="col" style="text-align: center; " |''[[Moon Tiara Action]]'' |
| − | ! scope="col" style="text-align: center; "|Moon Spiral Heart Attack |
+ | ! scope="col" style="text-align: center; " |''[[Moon Spiral Heart Attack]]'' |
|- |
|- |
||
| − | | style="text-align: center; "| |
+ | | style="text-align: center; " |[[File:SailorMoon-BodyAttack.png]] |
| − | | style="text-align: center; "| |
+ | | style="text-align: center; " |[[File:SailorMoon-MoonScrewPunch.png]] |
| − | | style="text-align: center; "| |
+ | | style="text-align: center; " |[[File:SailorMoon-MoonTiaraAction.png]] |
| − | | style="text-align: center; "| |
+ | | style="text-align: center; " |[[File:SailorMoon-MoonSpiralHeartAttack.png]] |
|- |
|- |
||
| − | | style="text-align: center; "|(During Mid-Air) ←→ + Punch |
+ | | style="text-align: center; " |(During Mid-Air) ←→ + Punch or L + A |
| − | | style="text-align: center; "|→↓→ + Punch |
+ | | style="text-align: center; " |→↓→ + Punch or L + B |
| − | | style="text-align: center; "|↓→ + Punch |
+ | | style="text-align: center; " |↓→ + Punch or L + C |
| − | | style="text-align: center; "|→↓←→ + Punch |
+ | | style="text-align: center; " |→↓←→ + Punch or L + R |
|} |
|} |
||
| − | == |
+ | ==[[Usagi Tsukino / Sailor Moon (manga)|Super Sailor Moon]]'s Move List== |
| + | {| class="article-table" style="width: 200px; " cellspacing="1" cellpadding="1" border="1" align="center" |
||
| − | |||
| ⚫ | |||
| ⚫ | |||
| − | ! scope="col" style="text-align: center; "| |
+ | ! scope="col" style="text-align: center; " |''[[Super Rabbit Flip]]'' |
| − | ! scope="col" style="text-align: center; " |
+ | ! scope="col" style="text-align: center; " |''[[Moon Strike]]'' |
| − | ! scope="col" style="text-align: center; "| |
+ | ! scope="col" style="text-align: center; " |''[[Rainbow Moon Heartache]]'' |
| ⚫ | |||
|- |
|- |
||
| − | | style="text-align: center; "| |
+ | | style="text-align: center; " |[[File:SuperSailorMoon-MoonTiaraAction.png]] |
| − | | style="text-align: center; "| |
+ | | style="text-align: center; " |[[File:SuperSailorMoon-SuperRabbitFlip.png]] |
| − | | style="text-align: center; "| |
+ | | style="text-align: center; " |[[File:SuperSailorMoon-MoonStrike.png]] |
| − | | style="text-align: center; "| |
+ | | style="text-align: center; " |[[File:SuperSailorMoon-RainbowMoonHeartAche.png]] |
|- |
|- |
||
| − | | style="text-align: center; "| |
+ | | style="text-align: center; " |↓→ + Punch or L + A |
| − | | style="text-align: center; "| |
+ | | style="text-align: center; " |(Near Opponent) ↓←↓→ + Punch or L + B |
| − | | style="text-align: center; "|↓→ + Punch |
+ | | style="text-align: center; " |(During Mid-Air) ↓→ + Punch or L + C |
| − | | style="text-align: center; "| |
+ | | style="text-align: center; " |→↓←→ + Punch or L + R |
| − | <p style="border-style: initial; border-color: initial; ">↓←↓→ + Punch</p> |
||
|} |
|} |
||
| + | |||
| − | ==<span style="font-style: normal; ">Sailor Mars' Move List</span>== |
||
| + | ==[[Chibiusa Tsukino / Sailor Chibi Moon (manga)|Sailor Chibi Moon]]'s Move List== |
||
| − | {| align="center" border="1" cellpadding="1" cellspacing="1" class="article-table" style="width: 200px; " |
||
| + | {| class="article-table" style="width: 200px; " cellspacing="1" cellpadding="1" border="1" align="center" |
||
| ⚫ | |||
| − | ! scope="col" style="text-align: center; " |
+ | ! scope="col" style="text-align: center; " |''[[Cyclondo]]'' |
| − | ! scope="col" style="text-align: center; "| |
+ | ! scope="col" style="text-align: center; " |''[[Aerial Rapid Punch]]'' |
| − | ! scope="col" style="text-align: center; "| |
+ | ! scope="col" style="text-align: center; " |''[[Luna P Attack]]'' |
| ⚫ | |||
|- |
|- |
||
| − | | style="text-align: center; "| |
+ | | style="text-align: center; " |[[File:SailorChibiMoon-Cyclondo.png]] |
| − | | style="text-align: center; "| |
+ | | style="text-align: center; " |[[File:SailorChibiMoon-AerialRapidPunch.png]] |
| − | | style="text-align: center; "| |
+ | | style="text-align: center; " |[[File:SailorChibiMoon-Luna-PAttack.png]] |
| − | | style="text-align: center; "| |
+ | | style="text-align: center; " |[[File:SailorChibiMoon-PinkSugarHeartAttack.png]] |
|- |
|- |
||
| − | | style="text-align: center; "| |
+ | | style="text-align: center; " |→←→ + Kick or L + A |
| − | | style="text-align: center; "| |
+ | | style="text-align: center; " |(During Mid-Air & Near Opponent) → + Punch or L + B |
| − | | style="text-align: center; "| |
+ | | style="text-align: center; " |↓→ + Punch or L + C |
| − | | style="text-align: center; "| |
+ | | style="text-align: center; " |←↓→← + Punch or L + R |
|} |
|} |
||
| − | ==Sailor |
+ | ==[[Ami Mizuno / Sailor Mercury (manga)|Sailor Mercury]]'s Move List== |
| ⚫ | |||
| − | {| align="center" border="1" cellpadding="1" cellspacing="1" class="article-table" style="height: 200px; width: 200px; " |
||
| − | ! scope="col" style="text-align: center; "| |
+ | ! scope="col" style="text-align: center; " |''[[Air Throw]]'' |
| − | ! scope="col" style="text-align: center; "| |
+ | ! scope="col" style="text-align: center; " |''[[Reverse Spin Kick]]'' |
| − | ! scope="col" style="text-align: center; "| |
+ | ! scope="col" style="text-align: center; " |''[[Shabon Spray]]'' |
| − | ! scope="col" style="text-align: center; "| |
+ | ! scope="col" style="text-align: center; " |''[[Shine Aqua Illusion]]'' |
|- |
|- |
||
| − | | style="text-align: center; "| |
+ | | style="text-align: center; " |[[File:SailorMercury-AirThrow.png]] |
| − | | style="text-align: center; "| |
+ | | style="text-align: center; " |[[File:SailorMercury-ReverseSpinKick.png]] |
| − | | style="text-align: center; "| |
+ | | style="text-align: center; " |[[File:SailorMercury-ShabonSpray.png]] |
| − | | style="text-align: center; "| |
+ | | style="text-align: center; " |[[File:SailorMercury-ShineAquaIllusion.png]] |
|- |
|- |
||
| − | | style="text-align: center; "| |
+ | | style="text-align: center; " |(During Mid-Air & Near Opponent) → + Punch or L + A |
| − | | style="text-align: center; "| |
+ | | style="text-align: center; " |→↓→ + Kick or L + B |
| − | | style="text-align: center; "|↓→ + Punch |
+ | | style="text-align: center; " |↓→ + Punch or L + C |
| − | | style="text-align: center; "| |
+ | | style="text-align: center; " |↓←↓→ + Punch or L + R |
|} |
|} |
||
| + | ==[[Rei Hino / Sailor Mars (manga)|Sailor Mars]]'s Move List== |
||
| − | |||
| + | {| class="article-table" style="width: 200px; " cellspacing="1" cellpadding="1" border="1" align="center" |
||
| − | ==Sailor Venus' Move List== |
||
| ⚫ | |||
| − | {| align="center" border="1" cellpadding="1" cellspacing="1" class="article-table" style="height: 200px; width: 200px; " |
||
| − | ! scope="col" style="text-align: center; "| |
+ | ! scope="col" style="text-align: center; " |''[[Spinning Raven]]'' |
| − | ! scope="col" style="text-align: center; "| |
+ | ! scope="col" style="text-align: center; " |''[[Fire Soul]]'' |
| − | ! scope="col" style="text-align: center; " |
+ | ! scope="col" style="text-align: center; " |''[[Burning Mandala]]'' |
| ⚫ | |||
|- |
|- |
||
| − | | style="text-align: center; "| |
+ | | style="text-align: center; " |[[File:SailorMars-MarsSnakeFire.png]] |
| − | | style="text-align: center; "| |
+ | | style="text-align: center; " |[[File:SailorMars-SpinningRaven.png]] |
| − | | style="text-align: center; "| |
+ | | style="text-align: center; " |[[File:SailorMars-FireSoul.png]] |
| − | | style="text-align: center; "| |
+ | | style="text-align: center; " |[[File:SailorMars-BurningMandala.png]] |
|- |
|- |
||
| − | | style="text-align: center; "| |
+ | | style="text-align: center; " |→↓→ + Punch or L + A |
| − | | style="text-align: center; "| |
+ | | style="text-align: center; " |↓← + Kick or L + B |
| − | | style="text-align: center; "|←↓→ + Punch |
+ | | style="text-align: center; " |←↓→ + Punch or L + C |
| − | | style="text-align: center; "| |
+ | | style="text-align: center; " |↓→↓← + Punch or L + R |
|} |
|} |
||
| − | ==Sailor |
+ | ==[[Makoto Kino / Sailor Jupiter (manga)|Sailor Jupiter]]'s Move List== |
| + | {| class="article-table" style="height: 200px; width: 200px; " cellspacing="1" cellpadding="1" border="1" align="center" |
||
| − | {| align="center" border="1" cellpadding="1" cellspacing="1" class="article-table" style="width: 200px; " |
||
| − | ! scope="col" style="text-align: center; "| |
+ | ! scope="col" style="text-align: center; " |''[[Jupiter Double Axel|Double Axel]]'' |
| − | ! scope="col" style="text-align: center; " |
+ | ! scope="col" style="text-align: center; " |''[[Thunderstorm]]'' |
| − | ! scope="col" style="text-align: center; "| |
+ | ! scope="col" style="text-align: center; " |''[[Supreme Thunder]]'' |
| − | ! scope="col" style="text-align: center; "| |
+ | ! scope="col" style="text-align: center; " |''[[Sparkling Wide Pressure]]'' |
|- |
|- |
||
| − | | style="text-align: center; "| |
+ | | style="text-align: center; " |[[File:SailorJupiter-DoubleAxel.png]] |
| − | | style="text-align: center; "| |
+ | | style="text-align: center; " |[[File:SailorJupiter-ThunderStorm.png]] |
| − | | style="text-align: center; "| |
+ | | style="text-align: center; " |[[File:SailorJupiter-SupremeThunder.png]] |
| − | | style="text-align: center; "| |
+ | | style="text-align: center; " |[[File:SailorJupiter-SparklingWidePressure.png]] |
|- |
|- |
||
| − | | style="text-align: center; "| |
+ | | style="text-align: center; " |→↓→ + Kick or L + A |
| − | | style="text-align: center; "| |
+ | | style="text-align: center; " |↓←→ + Kick or L + B |
| − | | style="text-align: center; "| |
+ | | style="text-align: center; " |↓→ + Punch or L + C |
| − | | style="text-align: center; "| |
+ | | style="text-align: center; " |↓→←→ + Punch or L + R |
|} |
|} |
||
| − | ==Sailor |
+ | ==[[Minako Aino / Sailor Venus (manga)|Sailor Venus]]'s Move List== |
| + | {| class="article-table" style="height: 200px; width: 200px; " cellspacing="1" cellpadding="1" border="1" align="center" |
||
| − | {| align="center" border="1" cellpadding="1" cellspacing="1" class="article-table" style="width: 200px; " |
||
| − | ! scope="col" style="text-align: center; " |
+ | ! scope="col" style="text-align: center; " |''[[Crescent Boomerang]]'' |
| − | ! scope="col" style="text-align: center; "| |
+ | ! scope="col" style="text-align: center; " |''[[Crescent Beam]]'' |
| − | ! scope="col" style="text-align: center; "| |
+ | ! scope="col" style="text-align: center; " |''[[Rolling Heart Vibration]]'' |
| − | ! scope="col" style="text-align: center; "| |
+ | ! scope="col" style="text-align: center; " |''[[Venus Love Me Chain]]'' |
|- |
|- |
||
| − | | style="text-align: center; "| |
+ | | style="text-align: center; " |[[File:SailorVenus-CrescentBoomerang.png]] |
| − | | style="text-align: center; "| |
+ | | style="text-align: center; " |[[File:SailorVenus-CrescentBeam.png]] |
| − | | style="text-align: center; "| |
+ | | style="text-align: center; " |[[File:SailorVenus-RollingHeartVibration.png]] |
| − | | style="text-align: center; "| |
+ | | style="text-align: center; " |[[File:SailorVenus-VenusLoveMeChain.png]] |
|- |
|- |
||
| − | | style="text-align: center; "| |
+ | | style="text-align: center; " |→← + Punch or L + A |
| − | | style="text-align: center; "| |
+ | | style="text-align: center; " |↓→ + Punch or L + B |
| − | | style="text-align: center; "| |
+ | | style="text-align: center; " |←↓→ + Punch or L + C |
| − | | style="text-align: center; "| |
+ | | style="text-align: center; " |→↓←→ + Punch or L + R |
|} |
|} |
||
| − | ==Sailor |
+ | ==[[Haruka Tenou / Sailor Uranus (manga)|Sailor Uranus]]'s Move List== |
| − | {| |
+ | {| class="article-table" style="width: 200px; " cellspacing="1" cellpadding="1" border="1" align="center" |
| − | ! scope="col" style="text-align: center; " |
+ | ! scope="col" style="text-align: center; " |''[[Somersault Kick]]'' |
| − | ! scope="col" style="text-align: center; "| |
+ | ! scope="col" style="text-align: center; " |''[[Air Slash]]'' |
| − | ! scope="col" style="text-align: center; "| |
+ | ! scope="col" style="text-align: center; " |''[[Spiral Buster]]'' |
| − | ! scope="col" style="text-align: center; "| |
+ | ! scope="col" style="text-align: center; " |''[[World Shaking]]'' |
|- |
|- |
||
| − | | style="text-align: center; "| |
+ | | style="text-align: center; " |[[File:SailorUranus-SomersaultKick.png]] |
| − | | style="text-align: center; "| |
+ | | style="text-align: center; " |[[File:SailorUranus-AirSlash.png]] |
| − | | style="text-align: center; "| |
+ | | style="text-align: center; " |[[File:SailorUranus-SpiralBuster.png]] |
| − | | style="text-align: center; "| |
+ | | style="text-align: center; " |[[File:SailorUranus-WorldShaking.png]] |
|- |
|- |
||
| − | | style="text-align: center; "| |
+ | | style="text-align: center; " |↓→← + Kick or L + A |
| − | | style="text-align: center; "| |
+ | | style="text-align: center; " |→↓→ + Punch or L + B |
| − | | style="text-align: center; "| |
+ | | style="text-align: center; " |(Near Opponent) ↓←↓→ + Punch or L + C |
| − | | style="text-align: center; "| |
+ | | style="text-align: center; " |←↓→↓ + Punch or L + R |
|} |
|} |
||
| − | ==Sailor |
+ | ==[[Michiru Kaiou / Sailor Neptune (manga)|Sailor Neptune]]'s Move List== |
| − | {| |
+ | {| class="article-table" style="width: 200px; " cellspacing="1" cellpadding="1" border="1" align="center" |
| − | ! scope="col" style="text-align: center; "| |
+ | ! scope="col" style="text-align: center; " |''[[Sea Serpent Strangle]]'' |
| − | ! scope="col" style="text-align: center; " |
+ | ! scope="col" style="text-align: center; " |''[[Tidal Wave]]'' |
| − | ! scope="col" style="text-align: center; "| |
+ | ! scope="col" style="text-align: center; " |''[[Splash Edge]]'' |
| − | ! scope="col" style="text-align: center; "| |
+ | ! scope="col" style="text-align: center; " |''[[Deep Submerge]]'' |
|- |
|- |
||
| − | | style="text-align: center; "| |
+ | | style="text-align: center; " |[[File:SeaSerpentStrangle.png]] |
| − | | style="text-align: center; "| |
+ | | style="text-align: center; " |[[File:SailorNeptune-TidalWave.png]] |
| − | | style="text-align: center; "| |
+ | | style="text-align: center; " |[[File:SailorNeptune-SplashEdge.png]] |
| − | | style="text-align: center; "| |
+ | | style="text-align: center; " |[[File:SailorNeptune-DeepSubmerge.png]] |
|- |
|- |
||
| − | | style="text-align: center; "| |
+ | | style="text-align: center; " |↓←→ + Punch or L + A |
| − | | style="text-align: center; "| |
+ | | style="text-align: center; " |↓↓ + Punch or L + B |
| − | | style="text-align: center; "| |
+ | | style="text-align: center; " |→↓→ + Punch or L + C |
| − | | style="text-align: center; "| |
+ | | style="text-align: center; " |→←↓→ + Punch or L + R |
|} |
|} |
||
| − | == |
+ | ==[[Setsuna Meiou / Sailor Pluto (manga)|Sailor Pluto]]'s Move List== |
| − | {| |
+ | {| class="article-table" style="width: 200px; " cellspacing="1" cellpadding="1" border="1" align="center" |
| − | ! scope="col" style="text-align: center; "| |
+ | ! scope="col" style="text-align: center; " |''[[Destiny Spinster]]'' |
| − | ! scope="col" style="text-align: center; "| |
+ | ! scope="col" style="text-align: center; " |''[[Twilight]]'' |
| − | ! scope="col" style="text-align: center; " |
+ | ! scope="col" style="text-align: center; " |''[[Dead Scream]]'' |
| − | ! scope="col" style="text-align: center; "| |
+ | ! scope="col" style="text-align: center; " |''[[Time Stop]]'' |
|- |
|- |
||
| − | | style="text-align: center; "| |
+ | | style="text-align: center; " |[[File:SailorPluto-DestinySpinStar.png]] |
| − | | style="text-align: center; "| |
+ | | style="text-align: center; " |[[File:SailorPluto-Twilight.png]] |
| − | | style="text-align: center; "| |
+ | | style="text-align: center; " |[[File:SailorPluto-DeadScream.png]] |
| − | | style="text-align: center; "| |
+ | | style="text-align: center; " |[[File:SailorPluto-TimeStop.png]] |
|- |
|- |
||
| − | | style="text-align: center; "| |
+ | | style="text-align: center; " |Punch Repeatedly or L + A |
| − | | style="text-align: center; "|(Near Opponent) |
+ | | style="text-align: center; " |(Near Opponent) →↓←→ + Punch or L + B |
| − | | style="text-align: center; "| |
+ | | style="text-align: center; " |←↓→ + Punch or L + C |
| − | | style="text-align: center; "| |
+ | | style="text-align: center; " |← (Hold 1 Second) → + Punch or L + R |
|} |
|} |
||
| + | |||
| + | [[es:Pretty Soldier Sailor Moon S (3DO)]] |
||
| + | [[pl:Sailor Moon S (3DO)]] |
||
| + | [[Category:Video games]] |
||
Revision as of 03:33, 3 April 2020
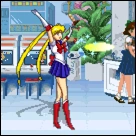
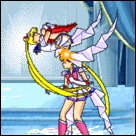
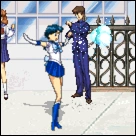
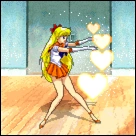
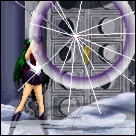
"Pretty Soldier Sailor Moon S" is a 2D fighting game made for the 3DO Interactive Multiplayer console. Released in 1995, it features most of the main characters from Sailor Moon S (minus Sailor Saturn). Each Sailor Senshi has her own set of attacks from both the anime and manga series as well as their signature finishing moves that can be used once the special meter gauge is full.
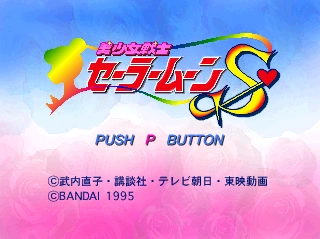
Sailor Moon S 3DO Game
Game Menu
The game offers a variety of options for the player's own entertainment and perusal.
Super Battle
VS Battle
- 1P VS COM
- 1P VS 2P
- COM VS COM
Team Battle
- 1P VS COM
- 1P VS 2P
Option
- Level: Easy, Normal, Hard
- Time: On, Off
- Sound: Stereo, Mono
- TV: Normal, Wide
- Control Keys: Normal, Easy 1, Easy 2
Database
- Profiles
- Music
Playable Characters
")
Sailor Moon
")
Super Sailor Moon
")
Sailor Chibi Moon
")
Sailor Mercury
")
Sailor Mars
")
Sailor Jupiter
")
Sailor Venus
")
Sailor Uranus
")
Sailor Neptune
")
Sailor Pluto
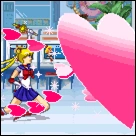
Sailor Moon's Move List
| Body Attack | Moon Screw Punch | Moon Tiara Action | Moon Spiral Heart Attack |
|---|---|---|---|
|
|
|
|
| (During Mid-Air) ←→ + Punch or L + A | →↓→ + Punch or L + B | ↓→ + Punch or L + C | →↓←→ + Punch or L + R |
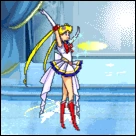
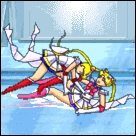
Super Sailor Moon's Move List
| Moon Tiara Action | Super Rabbit Flip | Moon Strike | Rainbow Moon Heartache |
|---|---|---|---|
|
|
|
|
| ↓→ + Punch or L + A | (Near Opponent) ↓←↓→ + Punch or L + B | (During Mid-Air) ↓→ + Punch or L + C | →↓←→ + Punch or L + R |
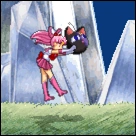
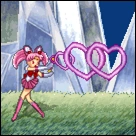
Sailor Chibi Moon's Move List
| Cyclondo | Aerial Rapid Punch | Luna P Attack | Pink Sugar Heart Attack |
|---|---|---|---|
|
|
|
|
| →←→ + Kick or L + A | (During Mid-Air & Near Opponent) → + Punch or L + B | ↓→ + Punch or L + C | ←↓→← + Punch or L + R |
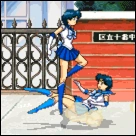
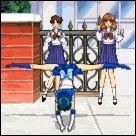
Sailor Mercury's Move List
| Air Throw | Reverse Spin Kick | Shabon Spray | Shine Aqua Illusion |
|---|---|---|---|
|
|
|
|
| (During Mid-Air & Near Opponent) → + Punch or L + A | →↓→ + Kick or L + B | ↓→ + Punch or L + C | ↓←↓→ + Punch or L + R |
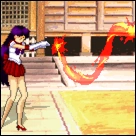
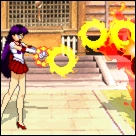
Sailor Mars's Move List
| Mars Snake Fire | Spinning Raven | Fire Soul | Burning Mandala |
|---|---|---|---|
|
|
|
|
| →↓→ + Punch or L + A | ↓← + Kick or L + B | ←↓→ + Punch or L + C | ↓→↓← + Punch or L + R |
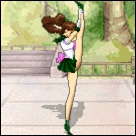
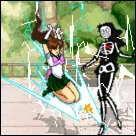
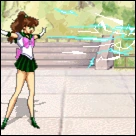
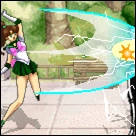
Sailor Jupiter's Move List
| Double Axel | Thunderstorm | Supreme Thunder | Sparkling Wide Pressure |
|---|---|---|---|
|
|
|
|
| →↓→ + Kick or L + A | ↓←→ + Kick or L + B | ↓→ + Punch or L + C | ↓→←→ + Punch or L + R |
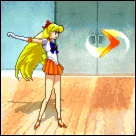
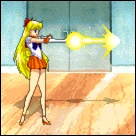
Sailor Venus's Move List
| Crescent Boomerang | Crescent Beam | Rolling Heart Vibration | Venus Love Me Chain |
|---|---|---|---|
|
|
|
|
| →← + Punch or L + A | ↓→ + Punch or L + B | ←↓→ + Punch or L + C | →↓←→ + Punch or L + R |
Sailor Uranus's Move List
| Somersault Kick | Air Slash | Spiral Buster | World Shaking |
|---|---|---|---|
|
|
|
|
| ↓→← + Kick or L + A | →↓→ + Punch or L + B | (Near Opponent) ↓←↓→ + Punch or L + C | ←↓→↓ + Punch or L + R |
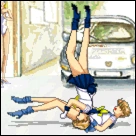
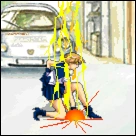
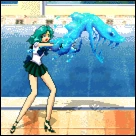
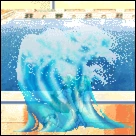
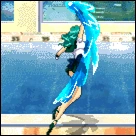
Sailor Neptune's Move List
| Sea Serpent Strangle | Tidal Wave | Splash Edge | Deep Submerge |
|---|---|---|---|
|
|
|

|
| ↓←→ + Punch or L + A | ↓↓ + Punch or L + B | →↓→ + Punch or L + C | →←↓→ + Punch or L + R |
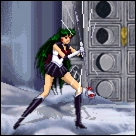
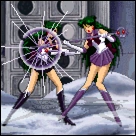
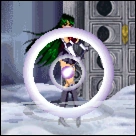
Sailor Pluto's Move List
| Destiny Spinster | Twilight | Dead Scream | Time Stop |
|---|---|---|---|
|
|
|
|
| Punch Repeatedly or L + A | (Near Opponent) →↓←→ + Punch or L + B | ←↓→ + Punch or L + C | ← (Hold 1 Second) → + Punch or L + R |